2018 Fat Bike Buyers Guide
The bike industry’s explosive fat bike sales may have slipped, but a quick glance around the winter trail systems of midwestern cities and mountain towns in the Rockies will reveal fat bikers riding alongside cross-country skiers.
Today recreation managers and bike clubs are grooming trails specifically for fat bikes and events and tourism agencies are building identities around the still-new winter sport.
The Bike
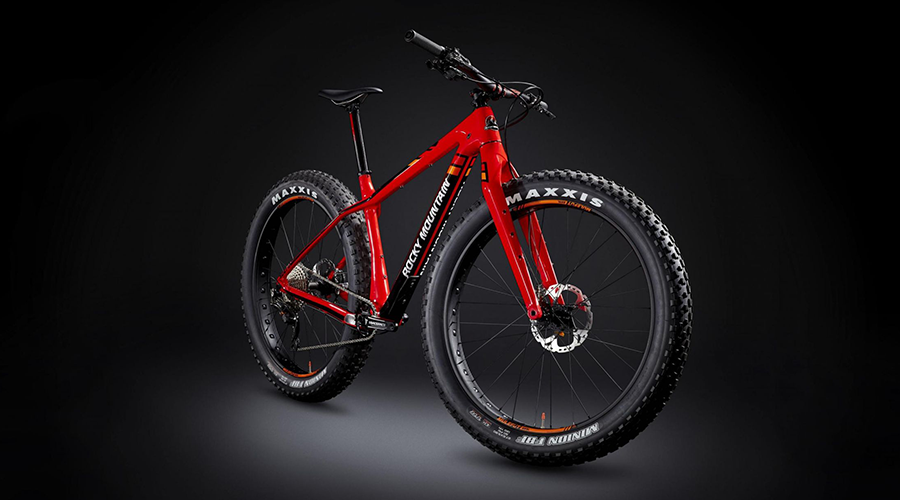
Fat bikes — off-road machines with 4.0in. or wider tires — were initially developed for exploring sand and snow, but their capability now has far-reaching interest from everyday mountain bikers to touring cyclists. With increasing interest, the market has expanded, along with materials, standards, pricing options, and availability — today it’s tough to find a brand that doesn’t offer a fat bike, and a few specialty brands offer nothing but.
Fat biking can really expand when and where you ride a bicycle.
The origins of fat bikes stretch back to riders in Alaska lacing two rims side by side and installing four tires on modified bikes — two at the front, two at the rear. Now instead of do-it-yourself projects, riders are spoiled for choice as differences between makes and models become increasingly granular.
Many shops allow demos, and some even rent fat bikes. Trying before you buy will allow you to experience fat biking before making a big investment.
Four or Five?
When selecting a fat bike, put two questions to yourself. First, how much flotation do you want? There used to be essentially two subsets of fat bikes, those with room for 4.0in. tires and those with space for 5.0in. or wider tires, and they all had good ol’ 26in. wheels. Now there’s a third option — 27.5 x 4.0in., or 27.5 Fat. How does it do in snow? Tune in later this month for a review of the Rocky Mountain Suzi Q to find out.
All are great fun off road and offer a significant gain in flotation over a standard mountain bike. Will you want the extra flotation of the widest tires available? If you will be riding mostly groomed tracks at your local nordic center, then probably not. But if you will be venturing into the sandy washes of Arizona for a week at a time, you might be happier with an extra inch of tire. This is where checking in with friends with fat bikes or listening to a respected bike shop employee can really help.
No one likes to change a flat with frozen fingers.
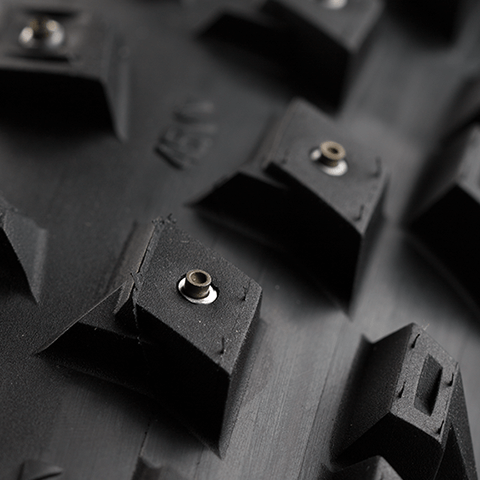
Rim widths vary from 65mm to 105mm. It’s important to keep the rim width in line with tire width. For 3.8in. tires, use 65–80mm wide rims. For 4.8–5.0in. tires, stick with 80–105mm wide rims, otherwise the shape of the tire can be affected. Using too wide a tire on a narrow rim can also lead to burping (the tire).
While the tires that come stock on most fat bikes are great all-around choices, there are more options with tubeless tires, and rims are also coming on strong. For riding in many places, going tubeless is a great way to reduce weight (sometimes over a pound per wheel!) and to avoid flats. No one likes to change a flat with frozen fingers.
Rigid, Front, or Full Suspension?
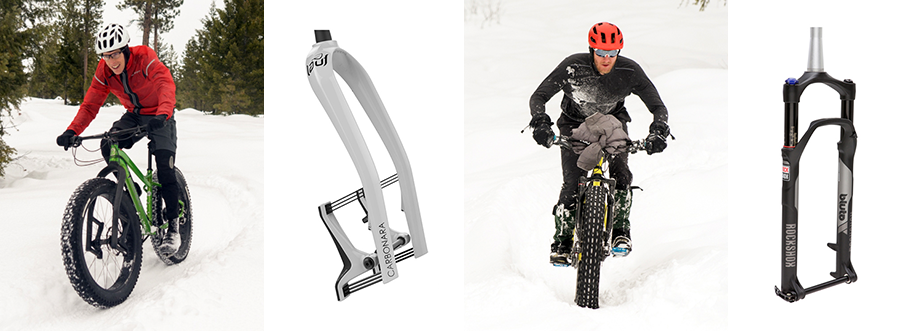
The second important question to consider is whether to invest in suspension. Most of the fat bikes sold currently are rigid, although many are now equipped with RockShox’s Bluto suspension fork. Several very good dual-suspension fat bikes are also on the market as of this writing, but they’re relatively uncommon.
The upside to suspension is increased comfort and control in rugged terrain. If you are considering a fat bike as your only mountain bike, suspension is probably a good idea. If most of your fat biking will be on trails shared with hikers, and your area experiences frequent freeze-thaw periods, then your fat bike routes are likely to be bumpy, pockmarked trails. This is where suspension can make things quite a bit more fun. Of course with suspension also comes increased weight and maintenance. The aforementioned Bluto from RockShox commands the lion’s share of the fat bike fork market, although a few others, including Carver and Wren, offer aftermarket options. Cannondale’s fat bike version of the Lefty fork is available only as original equipment. In a less traditional design, Lauf offers a leaf spring fat bike fork — watch for a review soon.
The upsides to a rigid fork are simplicity and, in many cases, the ability to carry extra water and supplies thanks to cage mounts. With many carbon fiber fat bike forks now on the market, you can also save quite a bit of weight over a suspension fork. If groomed trails are nearby, sticking with a rigid fork is a great way to go, and you’ll save money in the process.
Fat bikes that are more than a few years old, though, may pose problems when installing a suspension fork.
Thankfully many rigid fat bikes are now made with the aftermarket installation of a suspension fork in mind. Fat bikes that are more than a few years old, though, may pose problems when installing a suspension fork. Few of them were designed for the increased fork length and the tapered steerer tubes that feature on most suspension forks.
To further complicate things, hub standards remain all over the place. It really isn’t a big concern, as few of us are constantly swapping out wheels and forks on our bikes. But if you would like the option to install a suspension fork in the future, be sure to purchase a bike with a 150 x 15mm front axle standard.
Rear axle standards are also worth exploring. With the advent of thru-axles, fat bike rear ends have continued to widen. While the 177 x 12mm standard was popular a couple of years ago and can still be found, 197 x 12mm is now the most common rear dropout dimension as riders seek wider 5.0in. tires. Trek, Salsa, Surly, Specialized, Fatback, and many others have adopted this size because it also allows frame makers to use shorter chainstays so that handling stays sharp. The downside is the need for a wider bottom bracket to afford clearance for the crankarms and your feet, which ramps up Q Factor (see sidebar) and can make pedaling a fat bike feel considerably different than a standard mountain bike. Manufacturers seem to be working hard to find compromises and clever engineering solutions to mitigate the width demands.
When setting up your bike for a first ride, set the saddle a couple of millimeters lower than your other bikes. The wide Q Factor of most fat bikes puts your feet quite a bit farther apart and requires a slightly lower seat height.
Fat bikes, like mountain bikes, are generally moving toward slacker head tube angles. Earlier fat bikes were built with stability in mind, which translated into excellent touring manners. This is changing, but not necessarily in a bad direction for those looking to tour on a fat bike. While the new geometry is a bit more playful on trails, it still sits squarely in a mountain bike range of angles. This means that it will remain stable over rough terrain, even at speed.
When it comes time to buy a bike, be sure to get the right size for you. If you fall between sizes, it’s typically better to go for the smaller option. There’s a very practical reason for this: while most fat bike trails are composed of packed-in snow, to either side is usually deep, soft snow. A quick dismount often means planting your foot much lower than the surface of the trail, leading to uncomfortable encounters with your top tube.
Frame Material
Like any good debate, every player has its merits. Most fat bikes in production today are either aluminum or steel, although carbon fiber is gaining ground now that the major bike makers have joined the fray. A few titanium models exist as well.
Among the Adventure Cyclist staff, we’ve ridden, tested, and/or purchased steel, aluminum, and carbon bikes. The materials are far from the only variables, but each has pros and cons. Tech Editor Nick Legan purchased a steel fat bike because it offered a great value proposition and came with rack mounts. Editor-in-Chief Alex Strickland and Lead Magazine Designer Ally Mabry each own a carbon Salsa Mukluk, which tips the scales a hair under 30 lbs., a veritable feather of a fat bike, especially one with 5.0in. tires.
That said, we view our fat bikes as just one arrow in our bicycle quiver. If you plan on riding a fat bike as your primary machine, you may want to explore lighter options. For touring, just like on the road, a steel frame is more easily repaired in remote corners of the world.
Gearing
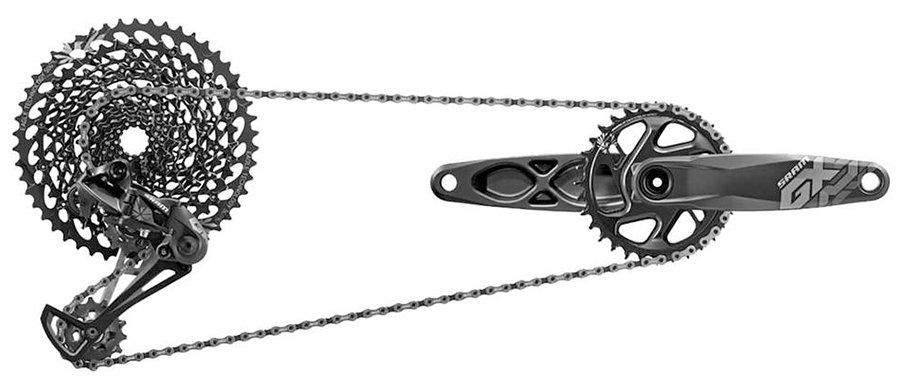
If you plan on loading up your fat bike for tours, be sure to scrutinize the gearing. With the increased weight of the wider rims and tires, plus the load of your camping items, a nice low gear will keep you happier. The sidewall on a fat tire may read 26 x 3.8in. or 4.8in., but realize that fat bikes are essentially 29ers so your gearing needs to suit the larger diameter. Also note that many fat bikes are only compatible with a single chainring (1x) drivetrain. You may need to downsize the front chainring and increase the largest rear cog to make touring a possibility. SRAM’s new wide-range Eagle drivetrain offers an interesting solution, especially at the more affordable GX groupset level.
Brakes
For true arctic riding, stick with mechanical, cable-actuated disc brakes. Avid’s excellent BB7 is a great choice as it is field serviceable and easy to set up and adjust. TRP’s excellent Spyre and the beautifully machined Clampers from Paul are also excellent options (read a comparison here). Hydraulic disc brakes have their place as well. If you’re sticking to slightly warmer temperatures or desert tours, go with a respectable brake manufacturer and you should be in good shape. For hydraulic brakes in very cold conditions, get a brake that uses DOT fluid (SRAM, Magura) instead of mineral oil (Shimano), as it has a lower operating temperature and will retain a consistent feel in frigid conditions.
Conclusion
Inevitably, hikers and other riders exclaim, “That looks like fun!” And they’re right. Getting out in wintry or sandy conditions aboard a bicycle is a great time.
Fat biking can really expand when and where you ride a bicycle. Because fat bikes are so capable in winter and sandy conditions, many bikepackers and touring cyclists have purchased them to explore beyond normal cycling horizons. With a bit of research, finding a fat bike that suits your needs is a simple affair. With the right clothing and accessories, there are fewer excuses than ever to stay inside.

Accessories
Staying warm in sub-zero temperatures isn’t easy. Working hard on a bike with 5.0in. tires helps, and the lower speeds of fat biking go a long way to keep windchill to a minimum. Be sure to always carry an emergency layer — a flat tire in frigid temps can turn a situation serious in a hurry. For riding in truly arctic conditions, do some research on vapor barriers, especially for your feet.
For hands, be sure to consider pogies. Originally designed for rowing, there are now cycling-specific versions for flats and dropbars from manufacturers like Bar Mitts and Wolf Tooth. A pogie keeps your hands warmer by attaching to your handlebars and creating a pocket that encloses your controls. Inside the pogies, your hands are out of the wind and further insulated. The difference can be astounding. And because you can use thinner gloves, pogies also offer a more natural feel on the controls.
Think about the grips you use as well. Foam grips insulate your hands from the handlebar better than rubber and plastic versions.
While some would say to install a suspension fork first, the best upgrade we made to our personal fat bikes was a dropper post. If you use one on your mountain bike and intend to ride trails on your fat bike, consider installing one. We’ve heard stories of extreme cold causing slow (or no) returns, but across a number of brands we’ve had good luck.
In freeze-thaw conditions, it can become difficult to use clipless pedals. And while there are several incredible winter-shoe options on the market (45NRTH, Bontrager, Shimano, Lake, and others), switching over to flat pedals can decrease headaches and make quick bailouts easier.
We ride in a variety of shoes ranging from Sorel or Boggs winter boots to standard and insulated versions of Five Ten and Pearl Izumi flats, often paired with gaiters to keep snow from coming over the top of the ankles.
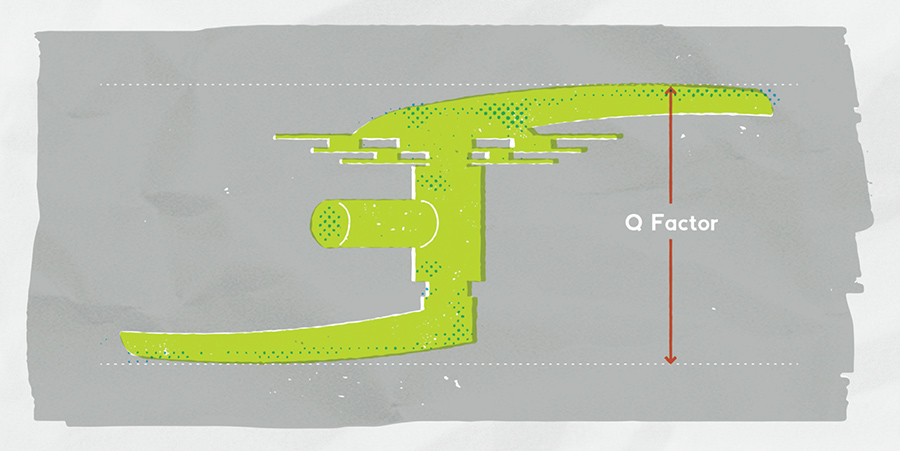
Q Factor
Q Factor, also known stance width or tread, is the distance between the bike’s crank arms, which is essentially the distance between your feet as you pedal.
The majority of road bikes have a bottom bracket width of 68mm (or the press-fit equivalent) with a Q Factor of about 150mm, which will vary depending on the bike’s crankset, the pedals, and where the cyclist affixes the cleats. Most mountain bikes have bottom bracket widths of either 68mm or 73mm — or 83mm in the case of older downhill mountain bikes — with a Q Factor of about 170mm.
Fat bikes, on the other hand, usually have a bottom bracket width of either 100mm or 121mm, and a Q Factor of 200mm and up depending on the crankset used. (Some winter-specific cycling boots even require clipless pedals with longer spindles, widening the rider’s stance even more.
If you’ve spent some time pedaling a fat bike — and especially if you’ve had knee issues in the past — the wide Q Factor is noticeable and usually not terribly comfortable.
Two brands that have made special efforts to pull that number down are Otso and Rocky Mountain. Last year we reviewed the Otso Voytek, which features a Q Factor as narrow as 183mm (depending on crankset). Watch for a review of Rocky Mountain’s Suzi Q (with a Q Factor of 192mm) later this month as we examine whether the narrow tread is worthwhile.


